
Named Monsters Positions
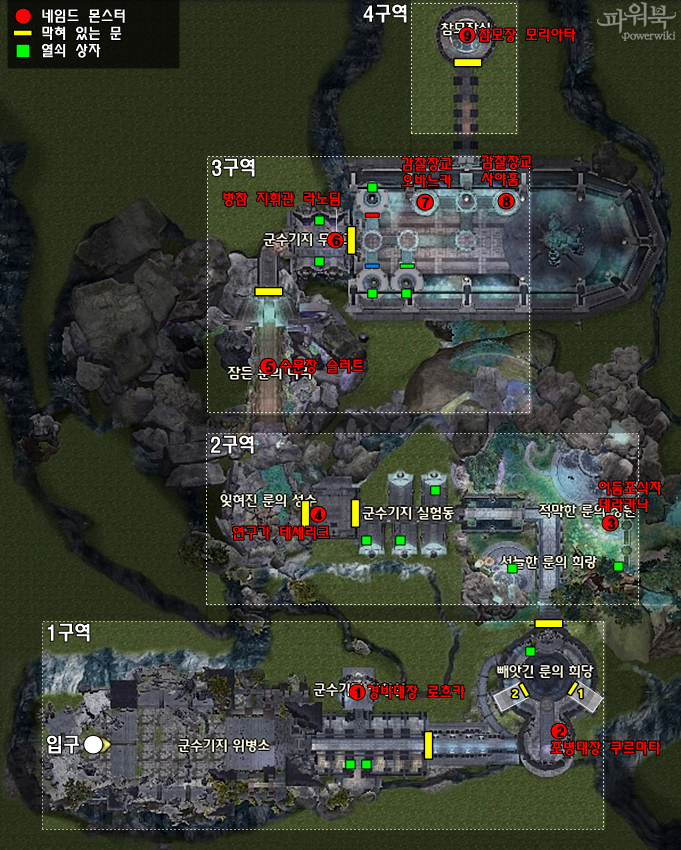
① 경비대장 로흐카 *
Caution:
- - Deals a lot of damage.
- - When he’s at 30% or below he will target a random player.
- Patterns:
- - Cleric should use aoe healing skills, located in the opposite corner of the monster.
- - At 30% or less the monster will target a random player, avoid wipe out using group healing skills, a recommended skill is healing absolution*
- Class Specific Tips:
- - DPS move and use aoe skills also, use advance healing potions as well as candy transformation items.
- Tips:
- - If anyone dies, you have to revive them fast.
- - When the Boss reaches 30% or less of HP he will target anyone, use shield scrolls, shield skills or any kind of shield to avoid wipe of the party.
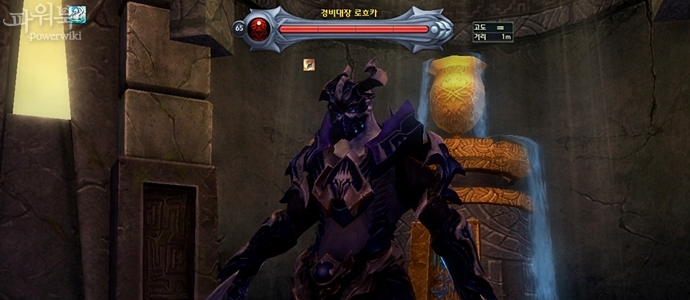
② 포병대장 쿠르마타 *
Caution:
- - Beware of the circle on the floor! It can one shot you.
- Patterns:
- - Monster puts traps on the floor, avoid the circles
- Class Specific Tips:
- - Templar, call when a circle is on the floor to avoid damage.
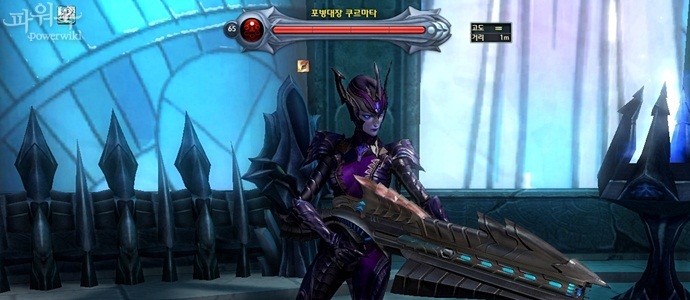
③ 어둠포식자 데라카낙 *
Cautions:
- -Difficult and annoying when he uses fear skill, stay at 15m to avoid it and use twice the cleanse skill(cleric)
④ 연구가 테세리크 *
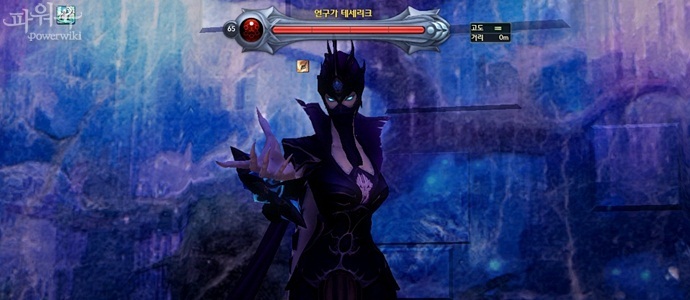
Pattern:
- - She summons a pair of adds, as soon as they appear kill them fast because they could kill you even though they are not hard to kill.
⑤ 수문장 슬러트 *

Caution:
- - Check nearby monsters
⑥ 병참 지휘관 라노딤 *
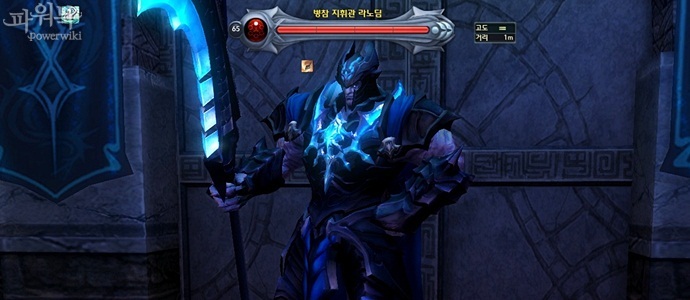
Caution:
- - Kill the monsters around him first, be careful of the aoe skills.
- Patterns:
- - He can make damage from 5,000 to 7,000. Stay away at least 10m of him
⑦ 감찰장교 오바느카 *
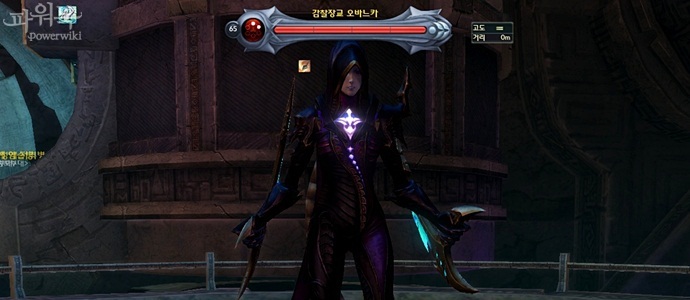
Caution:
- - Has lot of HP, it’s a pain to kill
- - At 25% he can summon adds and kill the tank
- - It has wide area skills
⑧ 감찰장교 사야훔 *
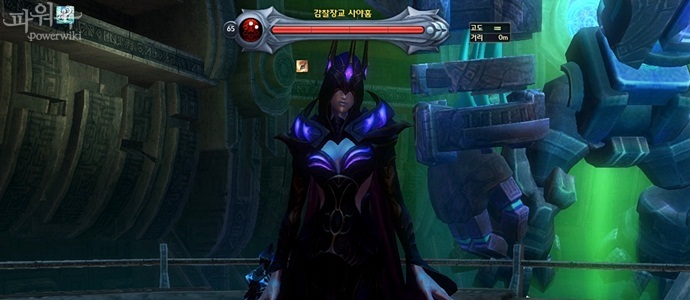
Tips:
- - Can transform the temp into a tree, you need to hit cleanse twice(cleric)
⑨ 참모장 모리아타 *

Caution:
- - Avoid his massive damage by walking in circles
- - Massive Hit-> Knock back-> can kill the tank, revive him fast
- - Troubador, use Rhapsody skills
- - Range dps, keep moving, avoid his attacks
Step 1: 음험한 우테룽 *
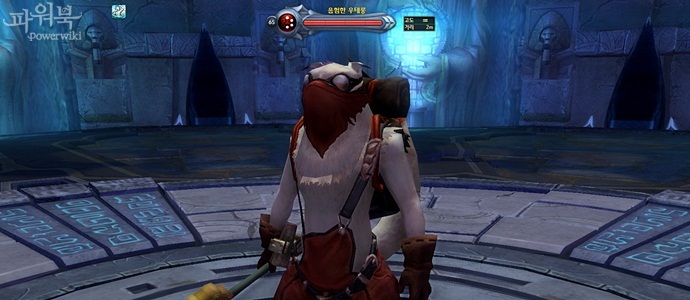
Caution:
- - The attack of this shugo is giving bombs that make 5,000 damage, avoid them
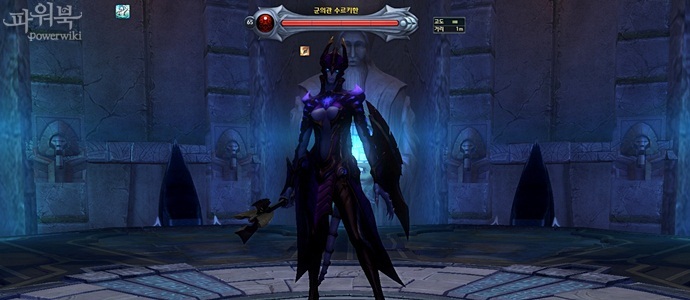
Step 2: 군의관 수르키한 *
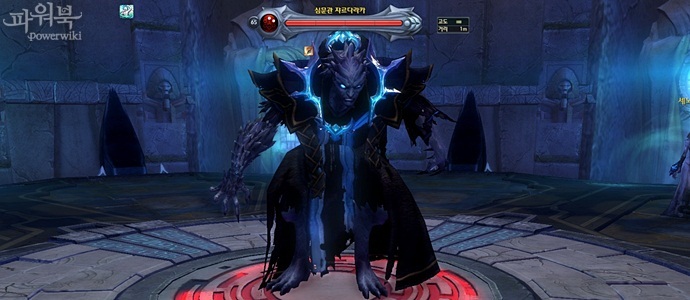
Step 3: 심문관 쟈르다라카 *
Step 4: 근위대장 아흐라딤 *
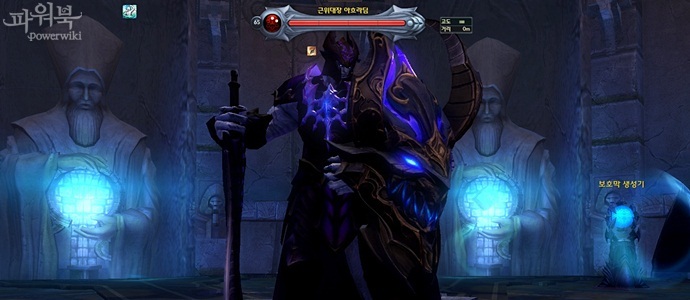
Caution:
- - Kill the shield generator as soon as it activates
- - After 25% he will cast a wide area damage, can be avoid if your 10m away.
- - Heals: Spam heals on the tank, specially when the shields are up.
- - DPS: use your skills effectively while the shield is off, if you cant kill him before the 6 mins and 30 sec pass, it will be almost impossible to kill him.
- - Tank: Maintain the aggro of the Boss.
- - Three shields will activate, number them before the fight begins, the order in which they activate is at 12 o’clock, 9 and 3. If you don’t kill the shield, you cant damage the boss
Step 5: 제40 군단장 쉬타 *

Named Monsters Drop Item List
Order
Names
Mythical Set
Eternal Set
Fable Set
Other Items
① 경비대장 로흐카 * Armor Weapon Token of Conquest
② 포병대장 쿠르마타 * Weapon/Armor Token of Conquest
③ 어둠포식자 데라카낙 * Accessories Weapon/Armor Weapon/Armor Complex Manastone Package
④ 연구가 테세리크 * Accessories Accessories Token of Conquest
⑤ 수문장 슬러트 * Accessories Armor/Accessories Armor/Accessories Complex Manastone Package
⑥ 병참 지휘관 라노딤 * Accessories Armor/Accessories Token of Conquest
⑦ 감찰장교 오바느카 * Accessories Armor/Accessories Weapon/Armor Complex Manastone Package
⑧ 감찰장교 사야훔 * Accessories Weapon/Armor Armor/Accessories Complex Manastone Package
⑨ 참모장 모리아타 * Armor Armor Token of Conquest
Bonus 재빠른 군수기지 도굴꾼 * Stolen Rune SetAion Weapons by UsersAncient Manastones
(Step 1) 음험한 우테룽 * Weapon Production Support Package
Token of Conquest
(Step 2) 군의관 수르키한 * Weapon Production Support PackageToken of Conquest
Final Boss (Step 3) 심문관 쟈르다라카 * Weapon/Armor Weapon Production Support PackageToken of Conquest
(Step 4) 근위대장 아흐라딤 * Armor Weapon/Armor Production Support Package
Token of ConquestHP Weapon Pieces
(Step 5) 제40 군단장 쉬타 *
Weapon/Armor
Weapon/Armor Token of ConquestProduction Support PackageComplex Manastone PackageHP Weapon Pieces
Remember this (*) names will change when it comes to NA!
0 kommentarer:
Post a Comment